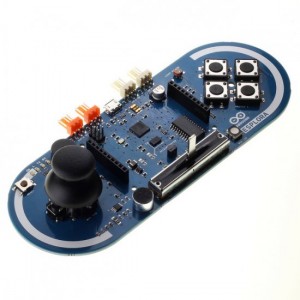
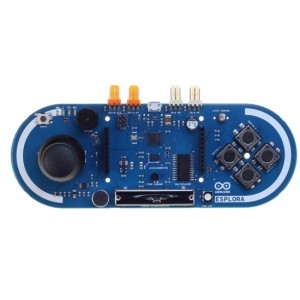
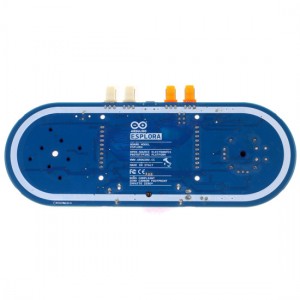
The Arduino Esplora is a microcontroller board derived from the Arduino Leonardo. The Esplora differs from all preceding Arduino boards in that it provides a number of built-in, ready-to-use setof onboard sensors for interaction. It's designed for people who want to get up and running with Arduino without having to learn about the electronics first. For a step-by-step introduction to the Esplora, check out the Getting Started with Esplora guide.
The Esplora has onboard sound and light outputs, and several input sensors, including a joystick, a slider, a temperature sensor, an accelerometer, a microphone, and a light sensor. It also has the potential to expand its capabilities with two Tinkerkit input and output connectors, and a socket for a color TFT LCD screen.
Like the Leonardo board, the Esplora uses an Atmega32U4 AVR microcontroller with 16 MHz crystal oscillator and a micro USB connection capable of acting as a USB client device, like a mouse or a keyboard.
In the upper left corner of the board there is a reset pushbutton, that you can use to restart the board. There are four status LEDS :
- ON [green] indicates whether the board is receiving power supply
- L [yellow] connected directly to the microcontroller, accessible through pin 13
- RX and TX [yellow] indicates the data being transmitted or received over the USB communication
The board contains everything needed to support the microcontroller; simply connect it to a computer with a USB cable to get started.
The Esplora has built-in USB communication; it can appear to a connected computer as a mouse or keyboard, in addition to a virtual (CDC) serial / COM port. This has other implications for the behavior of the board; these are detailed on the getting started page.
Specifications
- Microcontroller: ATmega32u4
- Operating Voltage: 5V
- Flash Memory: 32 KB of which 4 KB used by bootloader
- SRAM: 2.5 KB
- EEPROM: 1 KB
- Clock Speed: 16 MHz

The Esplora has the following on-board inputs and outputs:
- Analog joystick with central push-button two axis (X and Y) and a center pushbutton.
- 4 push-buttons laid out in a diamond pattern.
- Linear potentiometer slider near the bottom of the board.
- Microphone for getting the loudness (amplitude) of the surrounding environment.
- Light sensor for getting the brightness.
- Temperature sensor reads the ambient temperature
- Three-axis accelerometer measures the board's relation to gravity on three axes (X, Y, and Z)
- Buzzer can produce square-waves.
- RGB led bright LED with Red Green and Blue elements for color mixing.
- 2 TinkerKit Inputs to connect the TinkerKit sensor modules with the 3-pin connectors.
- 2 TinkerKit Outputs to connect the TinkerKit actuator modules with the 3-pin connectors.
- TFT display connector connector for an optional color LCD screen, SD card, or other devices that use the SPI protocol.
Shipping List
- Arduino Esplora board
- Micro USB Cable


